
Does this sound familiar? You send your company logo, e.g. for a business card, as a TIF, JPG or PNG file to a print shop or a graphic designer – and back comes the request for a “vector graphic” in EPS, AI or PDF format. But what the hell is a vector graphic – and why are they so important for professional printing?
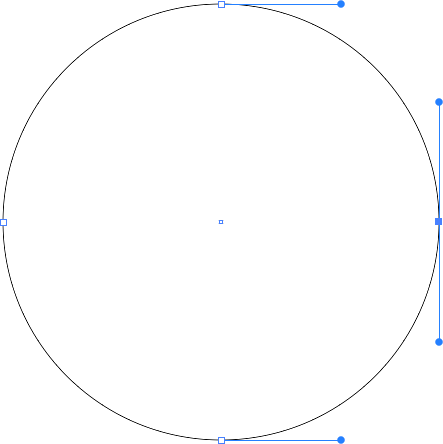
How is a vector graphic displayed on screen or printed?
Screens and most printers have no use for vectors or outlines – they must first fill them with pixels (“render”) – and this is where the greatest advantage of vector graphics comes into play: The higher the resolution of the screen or printer, the more and smaller pixels are packed into the outline – and the more exact or sharper the shape is recreated.
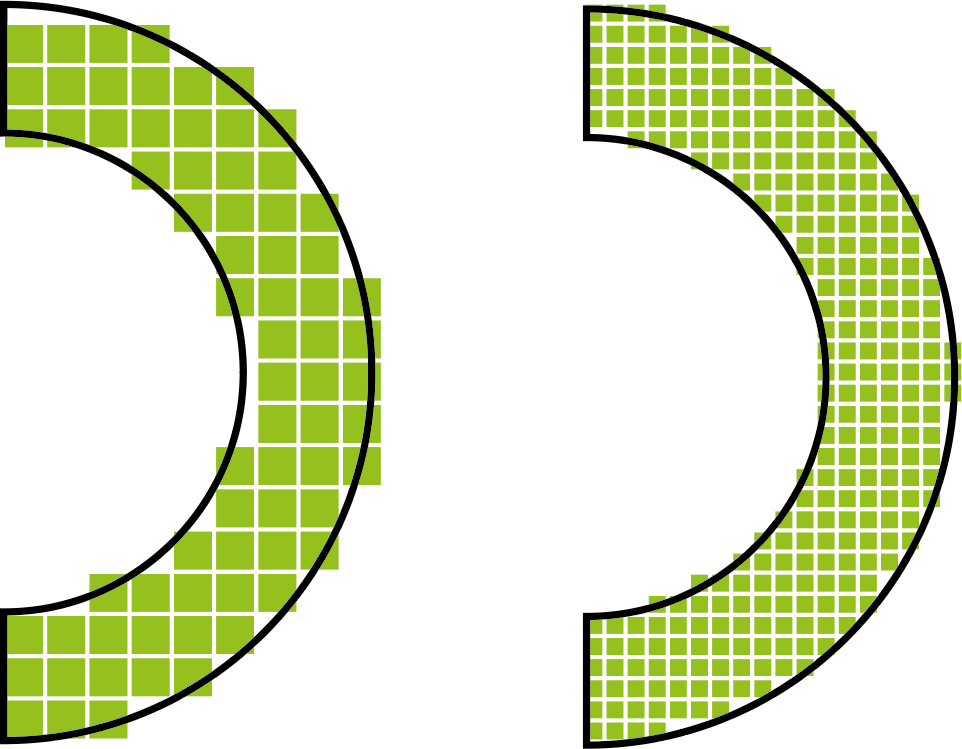
An average office laser printer can fill an arc, for example, with 600 dpi (dots per inch) (symbolic representation below, left), but a professional digital printing machine can fill it with 1200 dpi (right).
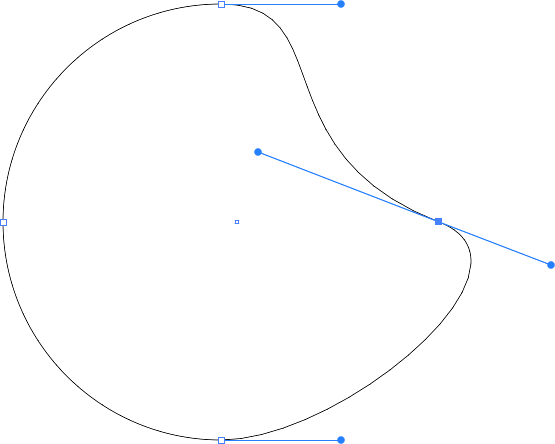
In order for the output device to know which colour the outline is to be displayed, vector graphics include information on the outline thickness, outline colour and area colour. In addition to single-colour outlines or areas, you can also use colour gradients or patterns.
The result: One and the same vector file is printed on the professional device with four times more pixels (twice the resolution to the square) than on the office printer. Or to put it another way: vector files themselves have no resolution at all. They are rendered at the maximum available resolution on any device.
How are they different from picture files?
Unlike vector-based files, pixel files (also called raster files or raster images) define a graphic element by a fixed number of pixels. An arc of a circle is therefore just a collection of square pixels. The disadvantage is that pixels can never reproduce a slope or even rounded edge, but only simulate it. If the resolution is too low, the famous “stairs” appear: The line becomes frayed and jagged.
Despite the fact that the screen or printer may have a much higher resolution than the image, the curves won’t look better – the serrated edges might be composed of several print or screen dots, but are not smoothed. The device has – due to the lack of vector – no idea that it should actually print a curve shape:
What are vector graphics typically used for?
Mainly for logos, lettering, illustrations with flat elements as well as technical raster and gradients, infographics, but also whole pages (ads, magazine pages etc. in PDF format). The vector format, however, is not suitable for photos and for graphics with certain special effects (e.g. filter effects, shadows, blurred elements, etc.)
But my JPG logo looks great – why does the print-shop insist on vector graphics anyway?
On the monitor display or on small printouts the difference may sometimes be quite small, as in this comparison – on the left the vector graphic (simulated), on the right the pixel graphic:

The pixel graphic, on the other hand, is always “frayed out” – the pixels only become larger, but do not increase. In order to smooth the steps optically, sometimes pixels of different brightness are added to the edges (“antialiasing”), but this method does not really improve logos and text.
In extreme cases, e.g. on a poster, it looks like this (again left vector, right pixel):
How can I tell whether I have a vector or a pixel graphic?
In most cases the file type or the file extension provides the decisive hint.
Vector graphics are usually contained in the following files:
- .ai (Adobe Illustrator)
- .svg (Scaleable Vector Graphics)
- .eps (Encapsulated PostScript)
- .pdf (Portable Document Format)
Pixel graphics are usually contained in the following files:
- .tif or .tiff (Tagged Image File Format)
- .jpg or .jpeg (Joint Photographic Experts Group)
- .png (Portable Network Graphics)
- .gif (Graphic Interchange Format)
- .psd (Adobe Photoshop)
However, there is a catch: Some file types can contain both vector and pixel graphics: AI, EPS and PDF files are usually vector-based, but they can also contain pixel graphics. Conversely, PSD files can also contain vector-based layers.
If you’re uncertain, open the file with programs such as Adobe Illustrator or inspect it visually, e.g. with “Preview” on the Mac or with the free Adobe Acrobat Reader: If the image remains sharp even when you zoom in drastically, it is a vector file. If not, it is composed of pixels.
How are vector graphics created?
There are special graphic programs for this. The most professional and best known is Adobe Illustrator, although it is only obtainable in the form of a relatively expensive subscription. A much cheaper and also very good alternative is Affinity Designer. Among the open source alternatives, Inkscape is one of the best known.
Strictly speaking, however, even a PDF that contains but text and geometric elements (lines, areas, etc. created as objects) and that has been exported, e.g. from layout programs, is a vector file. Though it may not contain placed pixel graphics (e.g. photos).
How can I convert a pixel graphic into a vector graphic?
That is not so easy – more about that in a moment.
But before you think about a conversion, you better ask once again whether a vector version, e.g. of your logo, does not exist anyway. Most professional graphic designers create logos as vector graphics first and then convert them into pixel graphics as needed. This is infinitely easier than vice versa. So contact your advertising agency, advertising department or the graphics studio that created your Corporate Design and always ask for a vector file (too) – preferably as soon as you place your order.
If you still can’t find a vector graphic, there are two ways to convert pixels into vectors:
A convenient method would be to use the tracing function in illustration programs like Adobe Illustrator. The emphasis is on “would be” – because the automatic function only works well in very rare cases. Especially when very exact geometric shapes have to be traced (horizontal and vertical lines, rectangles, circles, etc.), this method is only an emergency solution.
The second – and only professional – method remains: The pixel graphics must be traced manually (sometimes there is also talk of “vectorizing”). This is a job for experienced graphic and prepress specialists. Depending on the complexity of a logo, this can take a few minutes, but also several hours. But even if it may be expensive – the effort is worth it – because once vectorized, the logo is then optimized for perfect reproduction for all printing processes.
What doesn’t work at all: Open a TIF, JPG or PNG file in Photoshop, for example, and save it again as a PDF or EPS. This is because the pixel files are then only put into a kind of “digital envelope”. Inside, however, the pixels remain pixels – with all the disadvantages described above.
Finally, let’s take a look again: What advantages do vector files hold?
In short: Vector files are
- always reproducible with sharp edges
- indefinitly enlargeable and reduceable
- easy to edit (e.g. for colour changes)
- compact (and therefore easy to send by e-mail and quick to process)
- universally usable (e.g. also for foil cutting, punching, engraving, embroidering etc.)